MCL86+ Design Notes and Challenges

There were a number of challenges which needed to be overcome to be able to emulate the Intel 8088 correctly, be cycle accurate, and allow the MCL86+ to actually replace the Intel CPU in an IBM PC.

The initial concept was to see if it was possible to use the speed of an 800Mhz microcontroller to both emulate the 8086 instruction set and also manage the 8088’s local bus interface which is running at 4.77Mhz. I had recently finished the MCL65+ which is similar 6502 emulator, however this CPU only runs at 1Mhz – so 4.77Mhz was going to be more challenging, if possible at all…

I wrote some code which performed basic reads and writes on the local bus and was not surprised to find that it did not make timing. I tried direct accesses to the Teensy’s GPIOx registers to allow for a faster and more parallel accesses to the IO pins which still wasn’t fast enough due to the bit shifting and isolating to steer the 8088 address and data signals to the correct Teensy GPIOs. I found that using a few arrays to perform this mapping reduced this translation time significantly. For additional margin I am also running the Teensy 4.1 overclocked at 800Mhz which, according to the GUI, does not need cooling and I have found that it runs reliably at this speed. I also noticed that occasionally 8088 clocks were being lost, so I disabled Teensy interrupts while an 8088 bus cycle is in progress. After this code was running reliably I could then begin development of the MCL86+ PCB.

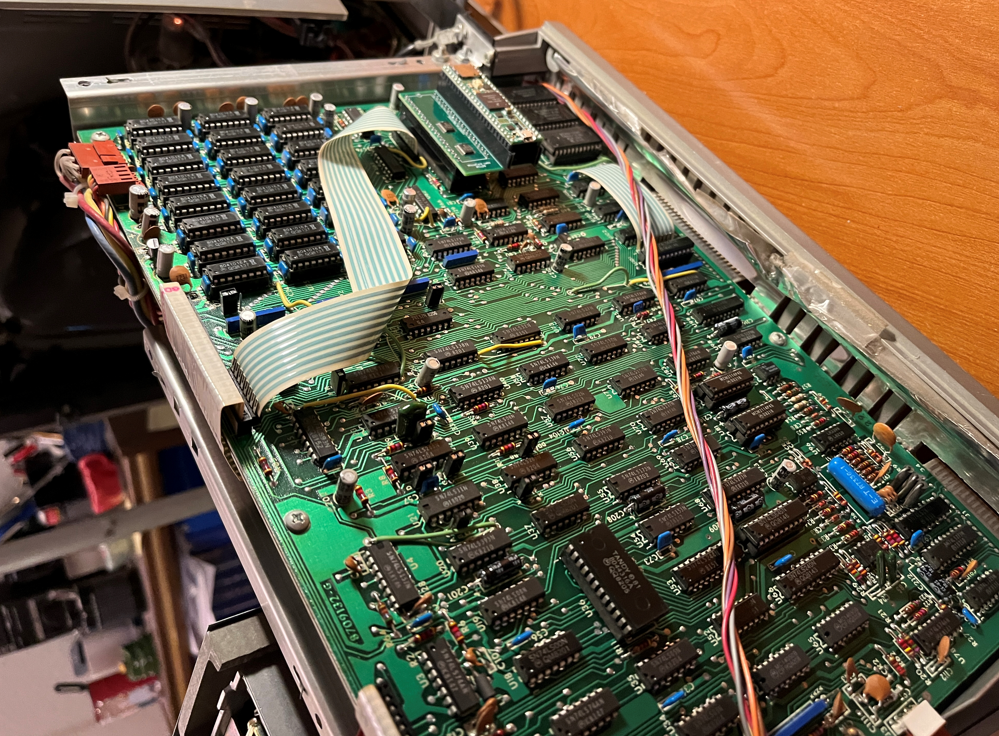
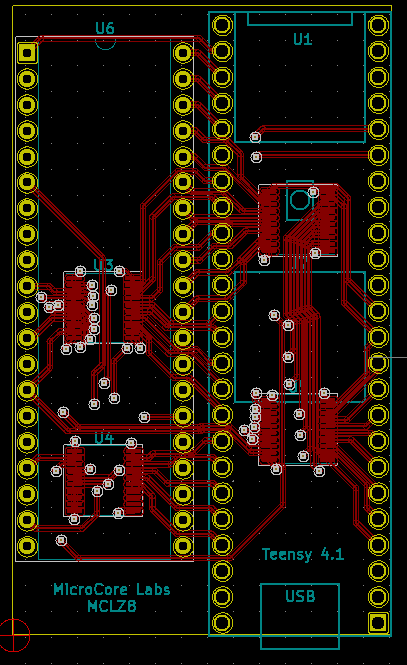
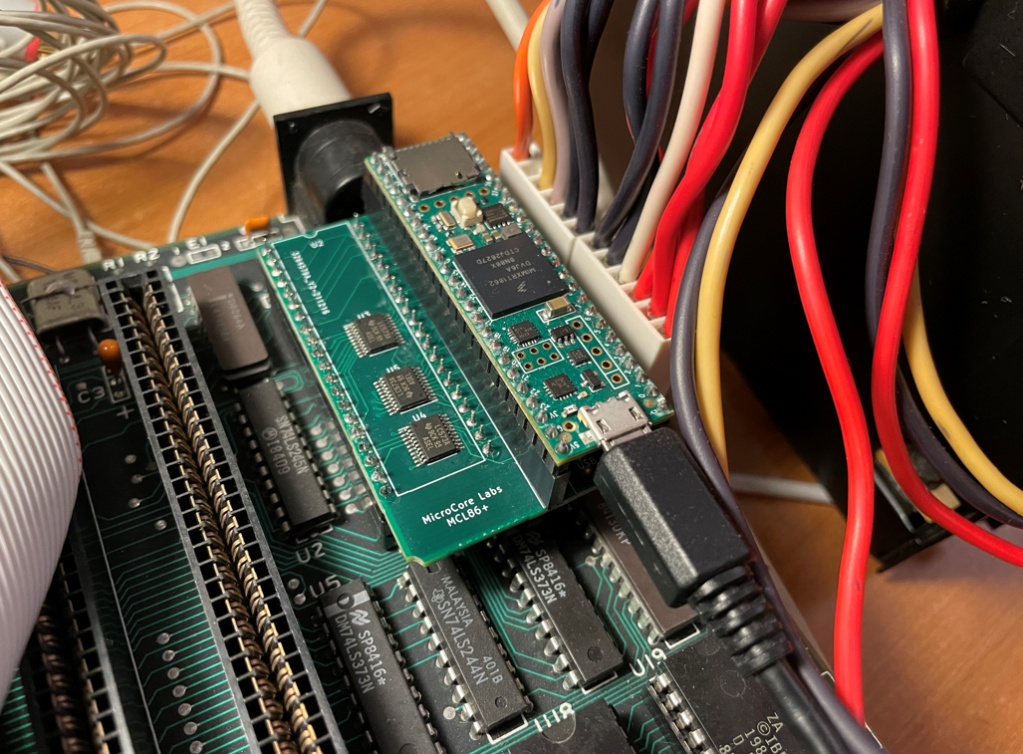
I used KiCad to generate the schematics and PCB layout. I tried to select Teensy IOs which closely routed to the appropriate 8088 pin and also to maximize the Teensy’s GPIOx register utilization. Because the target of this project was to run on the IBM PC I only needed to support the 8088’s Maximum mode which meant I would only need three 8-bit buffers on the MCL86+ to perform voltage translation. The Teensy 4.1 had enough pins to allow me to separate the databus inputs and output pins which would yield faster bus timing since I would not need to program the Teensy IO/s to change direction between input and outputs.

While the PCB was being built I had time to write the code for the 8086 emulator. A few years ago I wrote an x86 emulator for my MCL86 project which is a microsequencer-based FPGA core which also runs cycle accurate and accelerated modes, so I was already familiar with the 8088’s instruction set and also the “structural” aspects of the processor such as the ordering of interrupts, the operation of the prefix opcodes, and the prefetch queue.

The 8088 emulator code, like the real 8088, is divided into two sections: The Bus Interface (BIU) and the Execution Unit (EU). This allowed me to either use a BIU which accesses the real 8088 pins, or instead use a “fake” BUI which uses arrays for RAM and ROM so I cold develop and test the emulator using command-line C and printf’s. I wrote a number of opcodes tests fort the 8086 when I developed the MCL86, which saved a lot of time debugging the MCL86+.

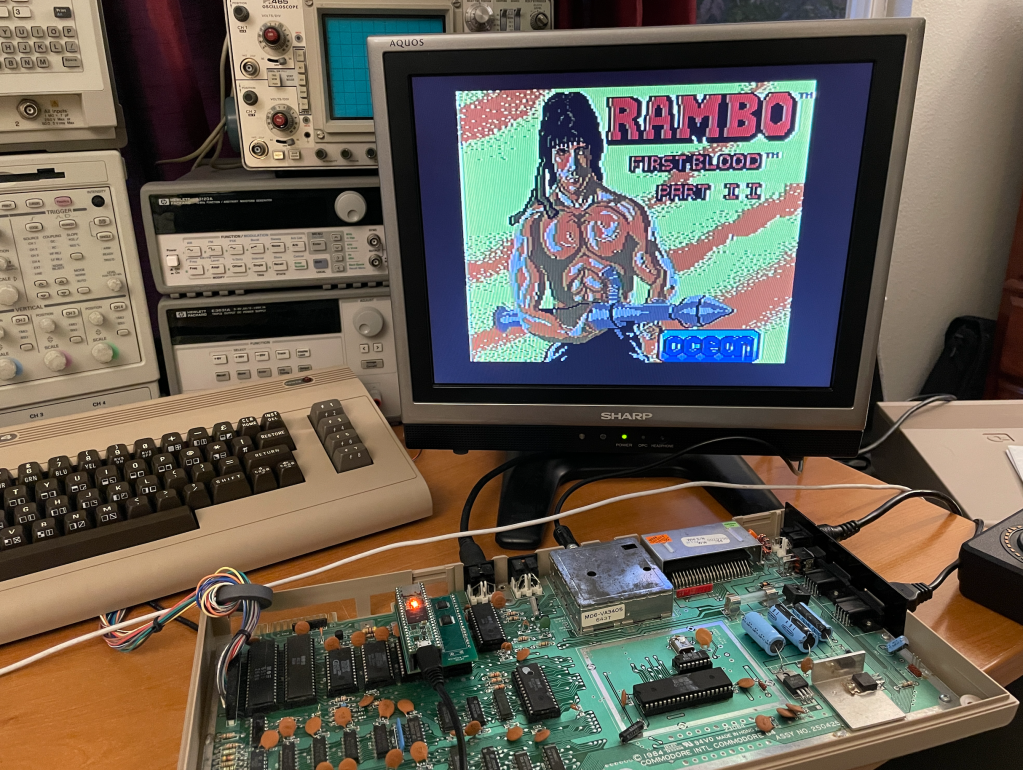
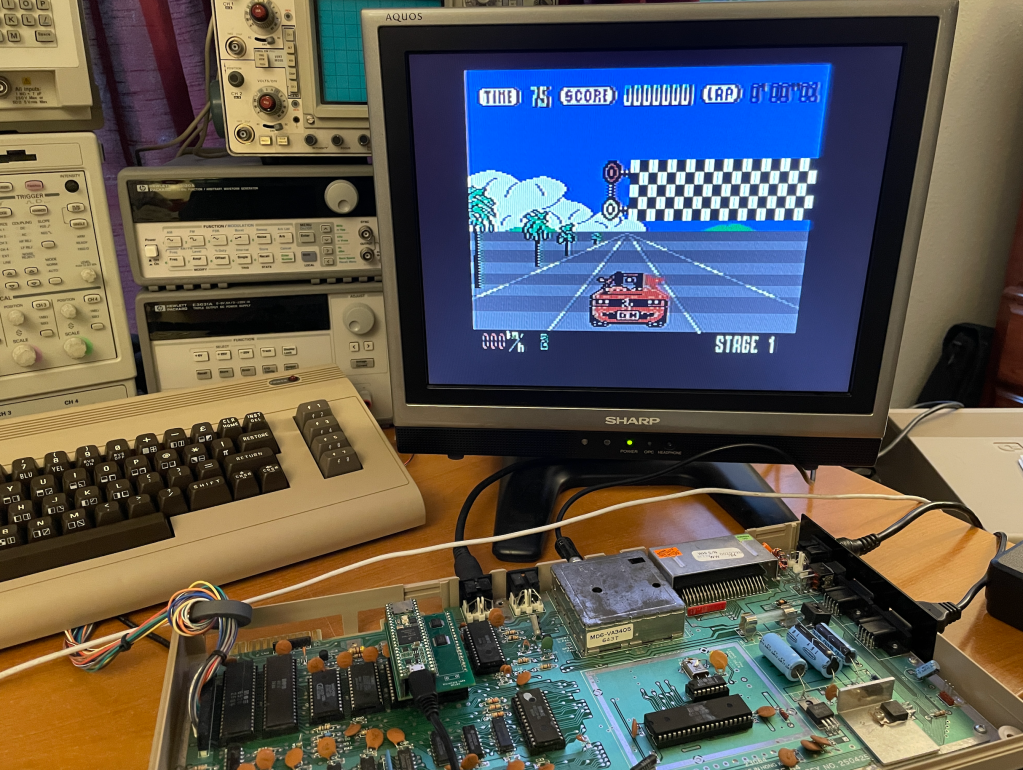
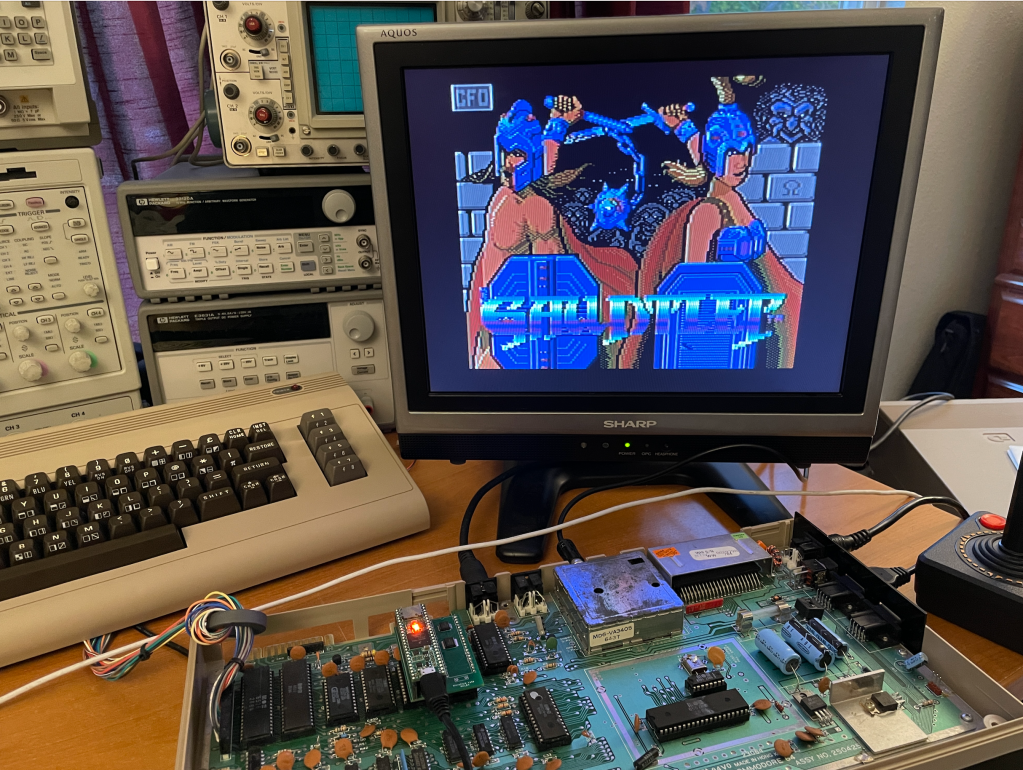
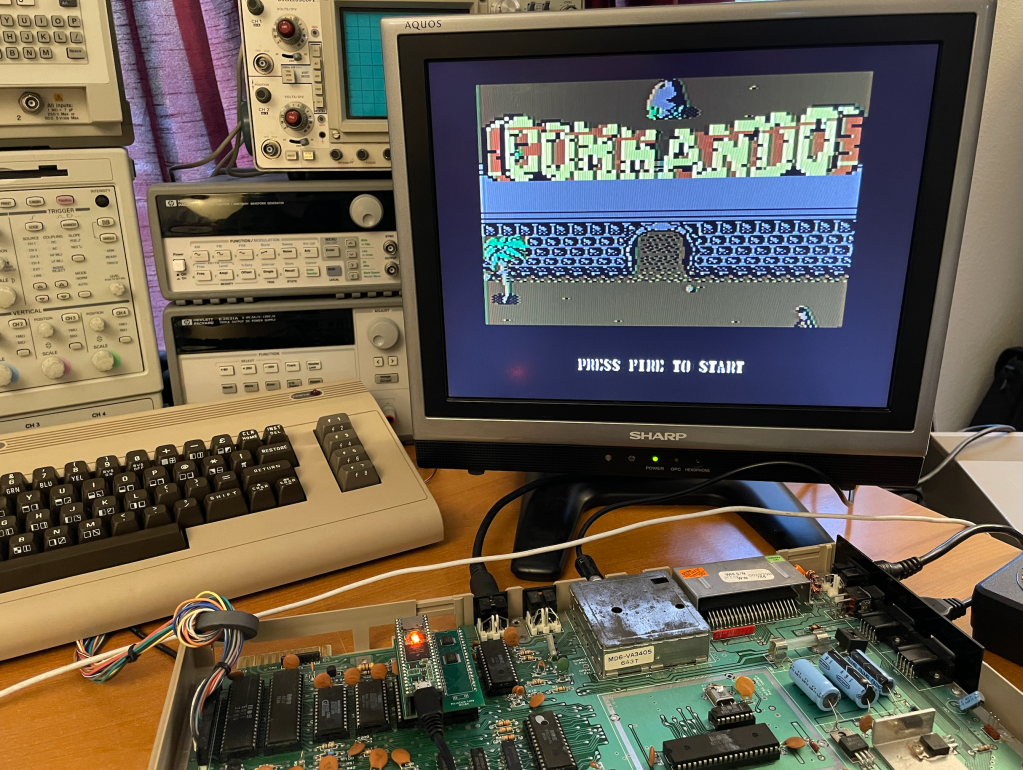
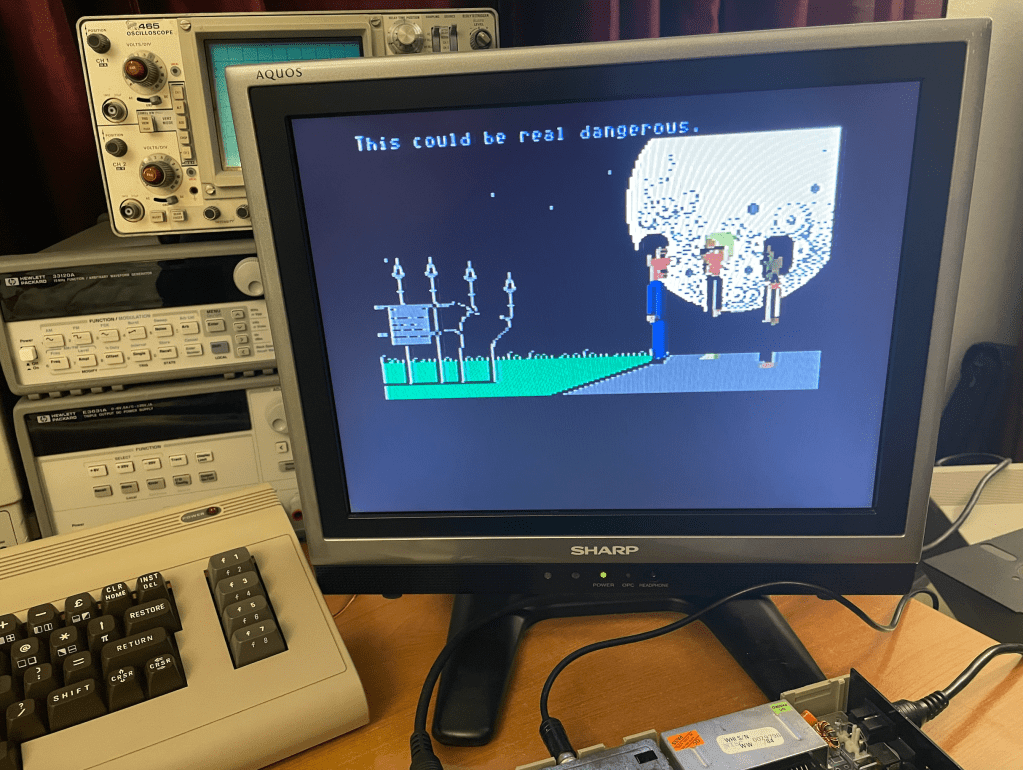
Of course the MCL86+ did not immediately work when I first plugged it into the IBM PC; however it did fetch instructions and produce some results to the CGA display when I ran the SuperSoft Diagnostic ROM. Some of the initial bugs were that I was not latching all of the 8088 address lines for the duration of the bus cycle. I also was pushing the wrong address to the stack for a CALL opcode, and the final bug was that I was not flushing the prefech queue upon one of the CALL opcodes. After that it was able to run just about any program I tried on it!

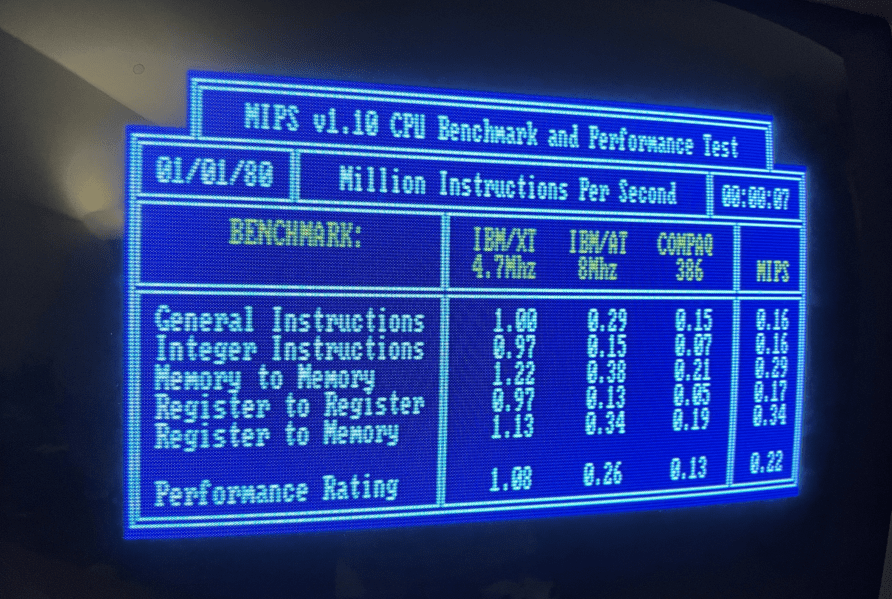
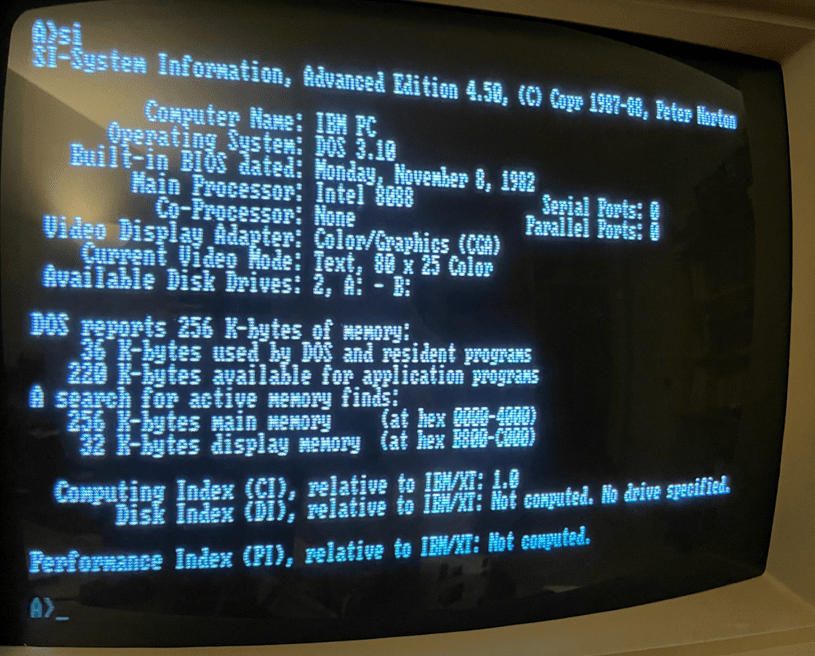
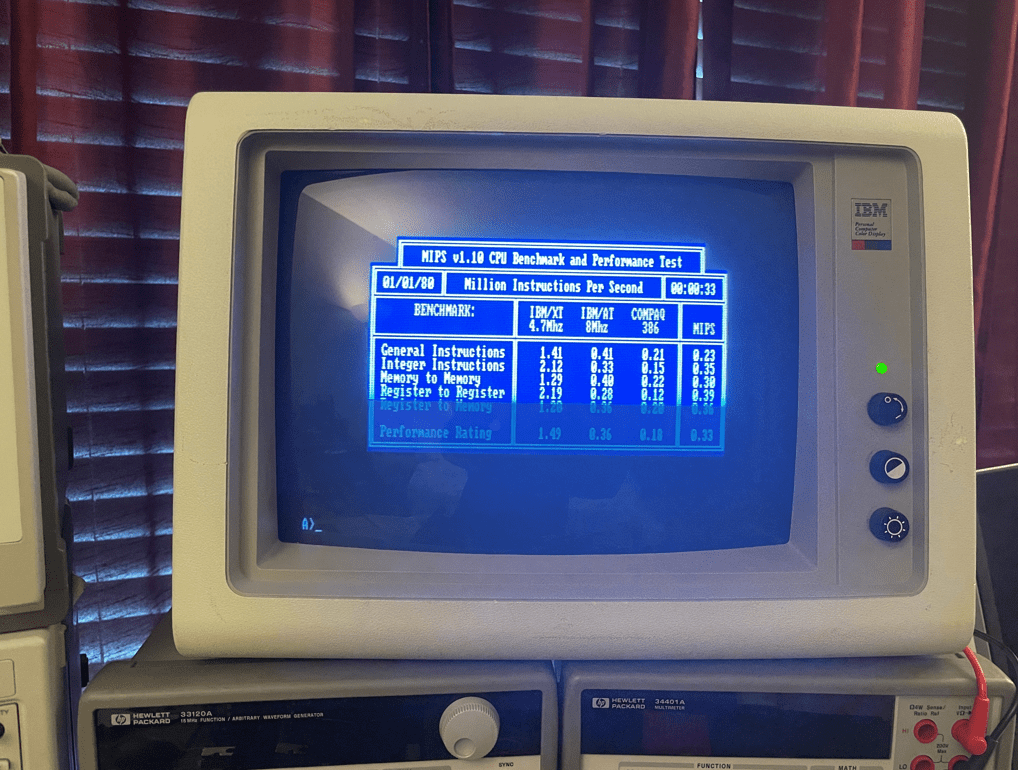
The next fun part was to try some acceleration! The first and easing thing to do was to simply disable the clock counter which allows the emulator to be cycle accurate. This yielded a nearly 50% improvement in speed as reported by a few benchmark programs. It was also not such a great degree of acceleration that things like the disk drive, keyboard, and timers seemed to still work.

I then tried integrating some of the motherboard’s RAM and ROMS and running them at the speed of the 800Mhz Teensy 4.1’s microcontroller but got very interesting, yet disappointing results…

When running the SuperSoft Diagnostic ROM the computer ran significantly faster than stock! Perhaps close to 10 times faster… But when I booted to BASIC, it will not able to accept keystrokes from the keyboard,. The speed was also too fast to boot from the disk drive; so I was not able to run any benchmarks to see what the acceleration yielded. One problem is that the IBM disk drives use DMA to copy data to/from the motherboard RAM, but if I emulated this RAM inside of the MCL86+ is it no longer coherent with that on the the motherboard, Perhaps if I had an XT-IDE which does not use DMA I could make further progress.

But, for now the design goals were met and it is time to move on to the next project.

All of the project files, the emulator source, the schematics, and the PCB fabrication files are on GitHub.

MCL86+ Design Notes and Challenges

MCL86+ 8088 Accelerator – Results

To see what kind of acceleration is possible on the MCL86+ I located the SuperSoft Diagnostic ROM and 256KB of RAM inside of the Teensy 4.1 micro controller so they will be accessed at closer to 800Mhz instead of the bus cycle-accurate 4.77Mhz. I also disabled cycle accuracy so that 8088 opcodes will also run at the speed of the microcontroller!

I took a short video and posted it on YouTube: https://youtu.be/xXVImaMU7Hw

There is quite a bit of acceleration … Quite a few times faster than the 4.77Mhz 8088. The entire SuperSoft Diagnostics test runs in about 35 seconds!

Unfortunately, I can’t run much of anything else! It appears that Microsoft BASIC cannot handle this amount of acceleration. It boots to BASIC, however it will not accept keystrokes. I cannot boot anything from the disk drive either at this speed, and if I first boot from the disk and then enable acceleration, the data is not coherent between the motherboard’s memory and the memory in the MCL86+ due to the disk drive DMA. I may need something like an XT-IDE which doesn’t use DMA to guarantee that all memories are coherent.

There are probably a number of software solutions which could address this. Perhaps being sensitive to certain interrupts and slowing down to cycle-accurate mode while they run would solve the BASIC and disk drive speed problems. Maintaining coherence between the internal and motherboard RAM could also potentially be solved by simply performing a “sync” after a disk access has occurred where the MCL86+ would just copy the RAM contents from the motherboard to the internal RAM, and then continue the program.

Oh well. Making an 8088 accelerator was not the design goal of this project. The challenge was to see if I could implement a 8088 software emulation running on a fast microcontroller and also support its bus interface while maintaining close to cycle accuracy. It is a more complicated project than the MCL65+ which emulates a 6502 and also supports the bus interface which was somewhat easier as the 6502 has a simpler instruction set, and the bus interface only runs at 1Mhz. The MCL86+ was quite a bit more challenging! It only took a few months to achieve the goal… so Yay! 🙂

The schematics, PCB, and C code are on GitHub: https://github.com/MicroCoreLabs/Projects/tree/master/MCL86%2B

MCL86+ 8088 Accelerator – Results

MCL86+ Running a few benchmarks

I tweaked the clock cycle counter a little to try to get a little closer to the speed of the genuine 8088, but different benchmarks yield different results! It is possible to dial in each of the hundreds of 8088 opcodes, but I will leave that as a project for another day.

Below are a few benchmark tests, plus the 8088 MPH demo which some consider a benchmark application.

Here is the results from the DOS program MIPS.COM

Here is the Norton Utilities System Information:

Here is a screenshot of the 8088 MPH Demo. I only have 256KB of RAM on this motherboard so I believe the software skips some demos which require the full 640KB of RAM.

Here is the YouTube video of the MCL86+ running the demo: https://youtu.be/AAgtQljp0Tc

MCL86+ Running a few benchmarks

Intel 8088 Accelerator – MCL86+

When setting the number of clocks taken by ALU operations to zero and cycle accurate bus cycles we appear to get a nearly 1.5X speed improvement over the stock 8088. This leaves no gaps between 8088 bus cycles which would normally occur while the ALU operations are completing. This may be the theoretical maximum speed attainable when all instructions and data use motherboard resources that use the 8088’s bus interface. When we try using internal memory for RAM and ROM which are not sensitive to the 4.77Mhz clock this speed boost should increase dramatically.

King’s quest also appears to run without issue!

Intel 8088 Accelerator – MCL86+

MCL86+ Drop-in 8088 CPU Emulator for IBM PC

My latest project, the The MCL86+, is a CPU replacement board which uses a Teensy 4.1 microcontroller board to emulate the Intel 8088 microprocessor which is used in the original IBM Personal Computer models 5150 and 5160.

The MCL86+ hardware supports only the Maximum mode at this time which will work for the IBM Personal Computers and most of the XT clones and can run cycle accurate at 4.77Mhz.

The 8086 emulation is written in simple C code and can be configured to run in clock accurate as well as accelerated modes. There is plenty of RAM and ROM to support multiple BIOS images, internal RAM, and optional peripherals. The MCL86’s 8086 Execution unit (EU) is abstracted from the Bus Interface Unit (BIU) which makes supporting different bus interfaces easy. In fact, the code was debugged using a command-line stub for the BIU so that I could run it on my laptop!

I will post all of the source code to GitHub soon. I recently was able to boot to DOS and I am currently working on cleaning up the code, zeroing in on the cycle accuracy, and testing different software applications on various motherboards.

The latest news is that it can boot multiple versions of DOS, run various CPU speed tests, and I have played Archon, Flight Simulator 2, JumpMan, and a few other tools with no problems (yet).

More information coming soon…

This is the picture of the board which fits nicely in an IBM 5160, hovering over the 8087 socket.

I used KiCad for the schematic entry and PCB layout. Here is the 3D view:

MCL86+ Drop-in 8088 CPU Emulator for IBM PC

MCL64 Update

 I recently updated the MCL64 code to more fully supports the 6502/6510 undocumented opcodes which appear to be necessary to run a number of the popular Commodore 64 games. 

It is interesting that some of them use unstable opcodes which yield inconsistent results yet can reduce code-side and speed by 30% or more! Clever programmers!

The code had been updated on GitHub: https://github.com/MicroCoreLabs/Projects/tree/master/MCL64/SourceCode

I took a few pictures using the MCL64 as the CPU in my Commodore 64:

MCL64 Update

Commodore 64 Tester using MCL64

I developed a tester for the Commodore 64 using the MCL64 which allows the user to replace the computer’s MOS6510 with the MCL64 board and run an extensive set of tests on the motherboard. The system generates the 6510 bus cycles to allow it to access all of the C64’s components the same way the original CPU does while communicating with the user via the Serial Console built into the Teensy 4.1!

Some more information on the MCL64 hardware is here: https://microcorelabs.wordpress.com/2021/04/16/mcl64-mos-6510-emulator-works-in-commodore-64/

The idea was to leverage the ability to write tests in simple C code to quickly debug and isolate motherboard faults on the Commodore 64. Other test programs for the C64 like Dead Test are usually written in 6502 assembly so difficult to maintain and extend, are not very large or extensive, and rely on the CPU to be functional to run them. This MCL64-based tester requires only power and clocks to be working for it to be able to generate bus cycles and begin testing components.

There are around fifty tests which include an isolated test for the PLA, extensive checks of individual address and data signals, DRAM and Color RAM storage ability, ROM contents, and VIC-II and SID register accesses. It should at least allow the user to diagnose and fix a non-booting Commodore 64.

The hope is that these tests can be used to quickly and easily identify faulty components on the vintage Commodore 64 machines.

The source code on GitHub: https://github.com/MicroCoreLabs/Projects/tree/master/MCL64_Tester

Here is a Serial Terminal capture of the tests:

MicroCore Labs
MCL64  -- Commodore 64 Board Tester
-----------------------------------

Menu
----
0) Initial tests user can perform with a handheld voltmeter or oscilloscope
1) Run basic test of all chips
2) Test PLA
3) Test KERNAL ROM 
4) Test BASIC ROM 
5) Test CHARACTER ROM 
6) Test DRAM
7) Test Color RAM
8) Test VIC-II
9) Toggle SIC Sound ON/OFF

Commodore 64 Tester using MCL64

MCL65+ running Brian’s Theme on Apple II+

I posted a video of an MCL65+ running the Brian’s Theme demo on an Apple II+

I believe this demo was distributed via cassette tape way back in 1979! I was able to load it onto my machine via this website by connecting my PC’s headphone output to the Apple’s cassette input: https://mirrors.apple2.org.za/Apple%20II%20Documentation%20Project/Software/Cassettes/

I first run the MCL65+ core in mode 1 which is 6502 cycle-accurate where each screen of the demo takes around 30 seconds. I then change to mode 2 acceleration which mirrors the computer’s memory with reads running accelerated and writes running cycle-exact while updating the computer’s memory. Basically, reads are accelerated and writes are cycle-accurate and pass through to the computer’s memory. I then change to mode 3 which uses mirrored memory and both reads and writes are accelerated!

I am changing acceleration modes using a series of keystrokes on the Apple II+ . I press left_arrow, right_arrow, left_arrow, then the number for the desired acceleration.

Here is a link to the video: https://youtu.be/7WuqLrW4Du0

And here is a link to the GitHub source code: https://github.com/MicroCoreLabs/Projects/tree/master/MCL65%2B

MCL65+ running Brian’s Theme on Apple II+

Ultimate Apple II Accelerator – The MCL65-Fast

The MCL65-Fast is a drop-in replacement for the 6502 CPU however it does not emulate the processor. Instead it allows you to run C code compiled on the Arduino GUI to run directly on the Teensy 4.1’s 32-bit ARM A9 which is an 800Mhz+ superscalar CPU. This provides the ability to write C code to run on this fast CPU in the place of the vintage computer’s 6502!

I uploaded a YouTube demonstration which uses it in an Apple II+ seen here:

The MCL65-Fast has control over the 6502 bus so it has access to all of the motherboard’s peripherals and slots which include the keyboard, video, sound, and anything plugged into an expansion slot. To access the Apple II video and keyboard, I have included a printf, and scanf, and other functions to display characters to the Apple II’s video as well as access its keyboard. With these functions you can write programs using regular C code and use printf and scanf to accept input and display the results!

The source is available on GitHub here: https://github.com/MicroCoreLabs/Projects/tree/master/MCL65%2B/SourceCode

The YouTube demo video shows how fast the MCL65-Fast runs inside of an Apple II+. I first show the board running the MCL65+ 6502 in cycle-accurate emulation mode and then download the MCL65-Fast code which demonstrates a few small functions which show the incredible speed!

The MCL65-Fast would be fun for people who would like to develop programs for the Apple II or other 6502 computers while using the modern and easy to use Arduino tools. It is also fun to see these vintage machines running at ridiculously fast speeds!

Ultimate Apple II Accelerator – The MCL65-Fast